Experiment Page
Experiment pages opened by the user in a session are added to the tab bar for easy access. Navigate to this page by clicking a row in the Device Experiment List. This page will also open automatically when a new experiment is started from within the application.
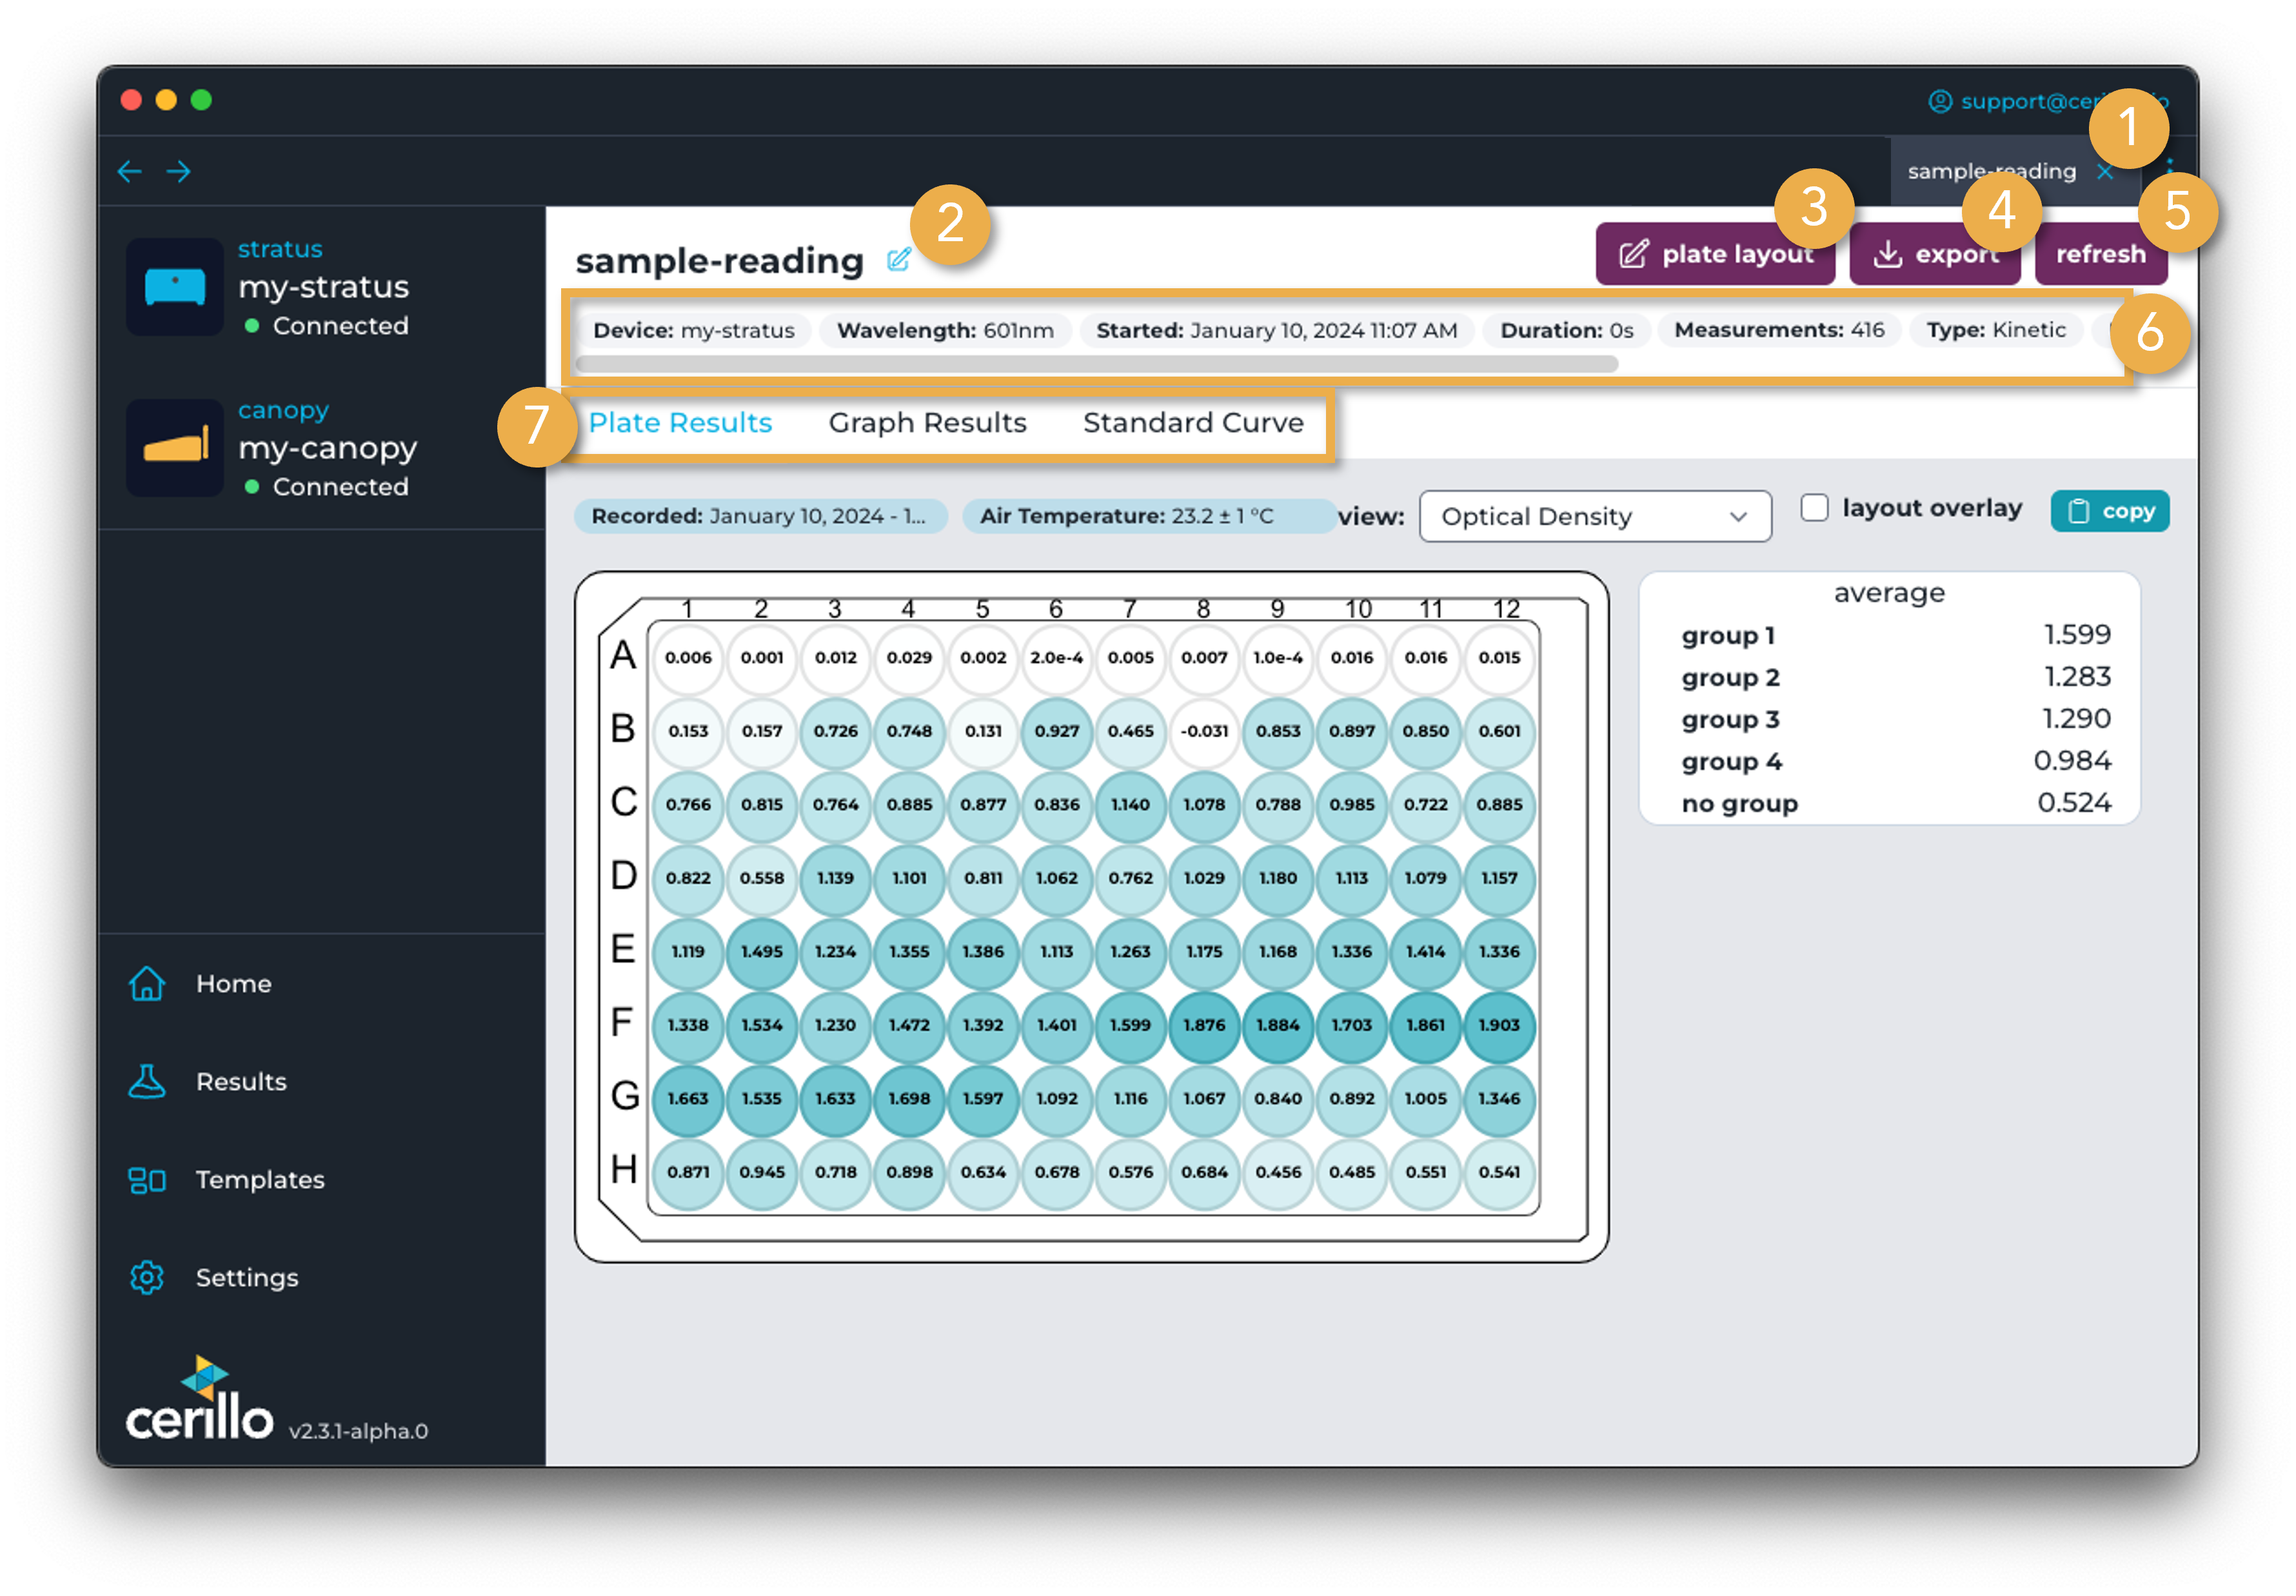
Number |
Element |
Description |
|---|---|---|
1 |
Experiment Tab |
Click here to return to this experiment, or click the x to close the tab if you no longer need to look at it. Closing the tab will not stop the experiment. |
2 |
Experiment Name |
The name of the experiment, if available. If the name is not available, like if the experiment was just started, then the experiment ID will display. The experiment ID is generated when the experiment is started as a unique value to identify the experiment by. |
3 |
Edit Plate Layout Button |
Click to edit the plate layout of the plate for the experiment. This can be useful for removing outliers, or for making plate layout changes after an experiment is started. |
4 |
Export Button |
|
5 |
Refresh Button |
Refresh experiment data and info from the device. Right click to force refresh, which will retransfer the experiment from the device. Force refreshing can be useful if the experiment didn’t transfer correctly for whatever reason and refreshing normally does not fix the issue. |
6 |
Experiment Info |
Information about the experiment such as the experiment name, what device it was run on and what time it was started |
7 |
Experiment View Tab |
Tabular navigation between different representations of experiment results and the plate layout. Plate Results will display a heatmap of each experiment measurement’s optical density, as seen in the image above. Graph Results will navigate to a graphical representation of the experiment. |
Experiment Export
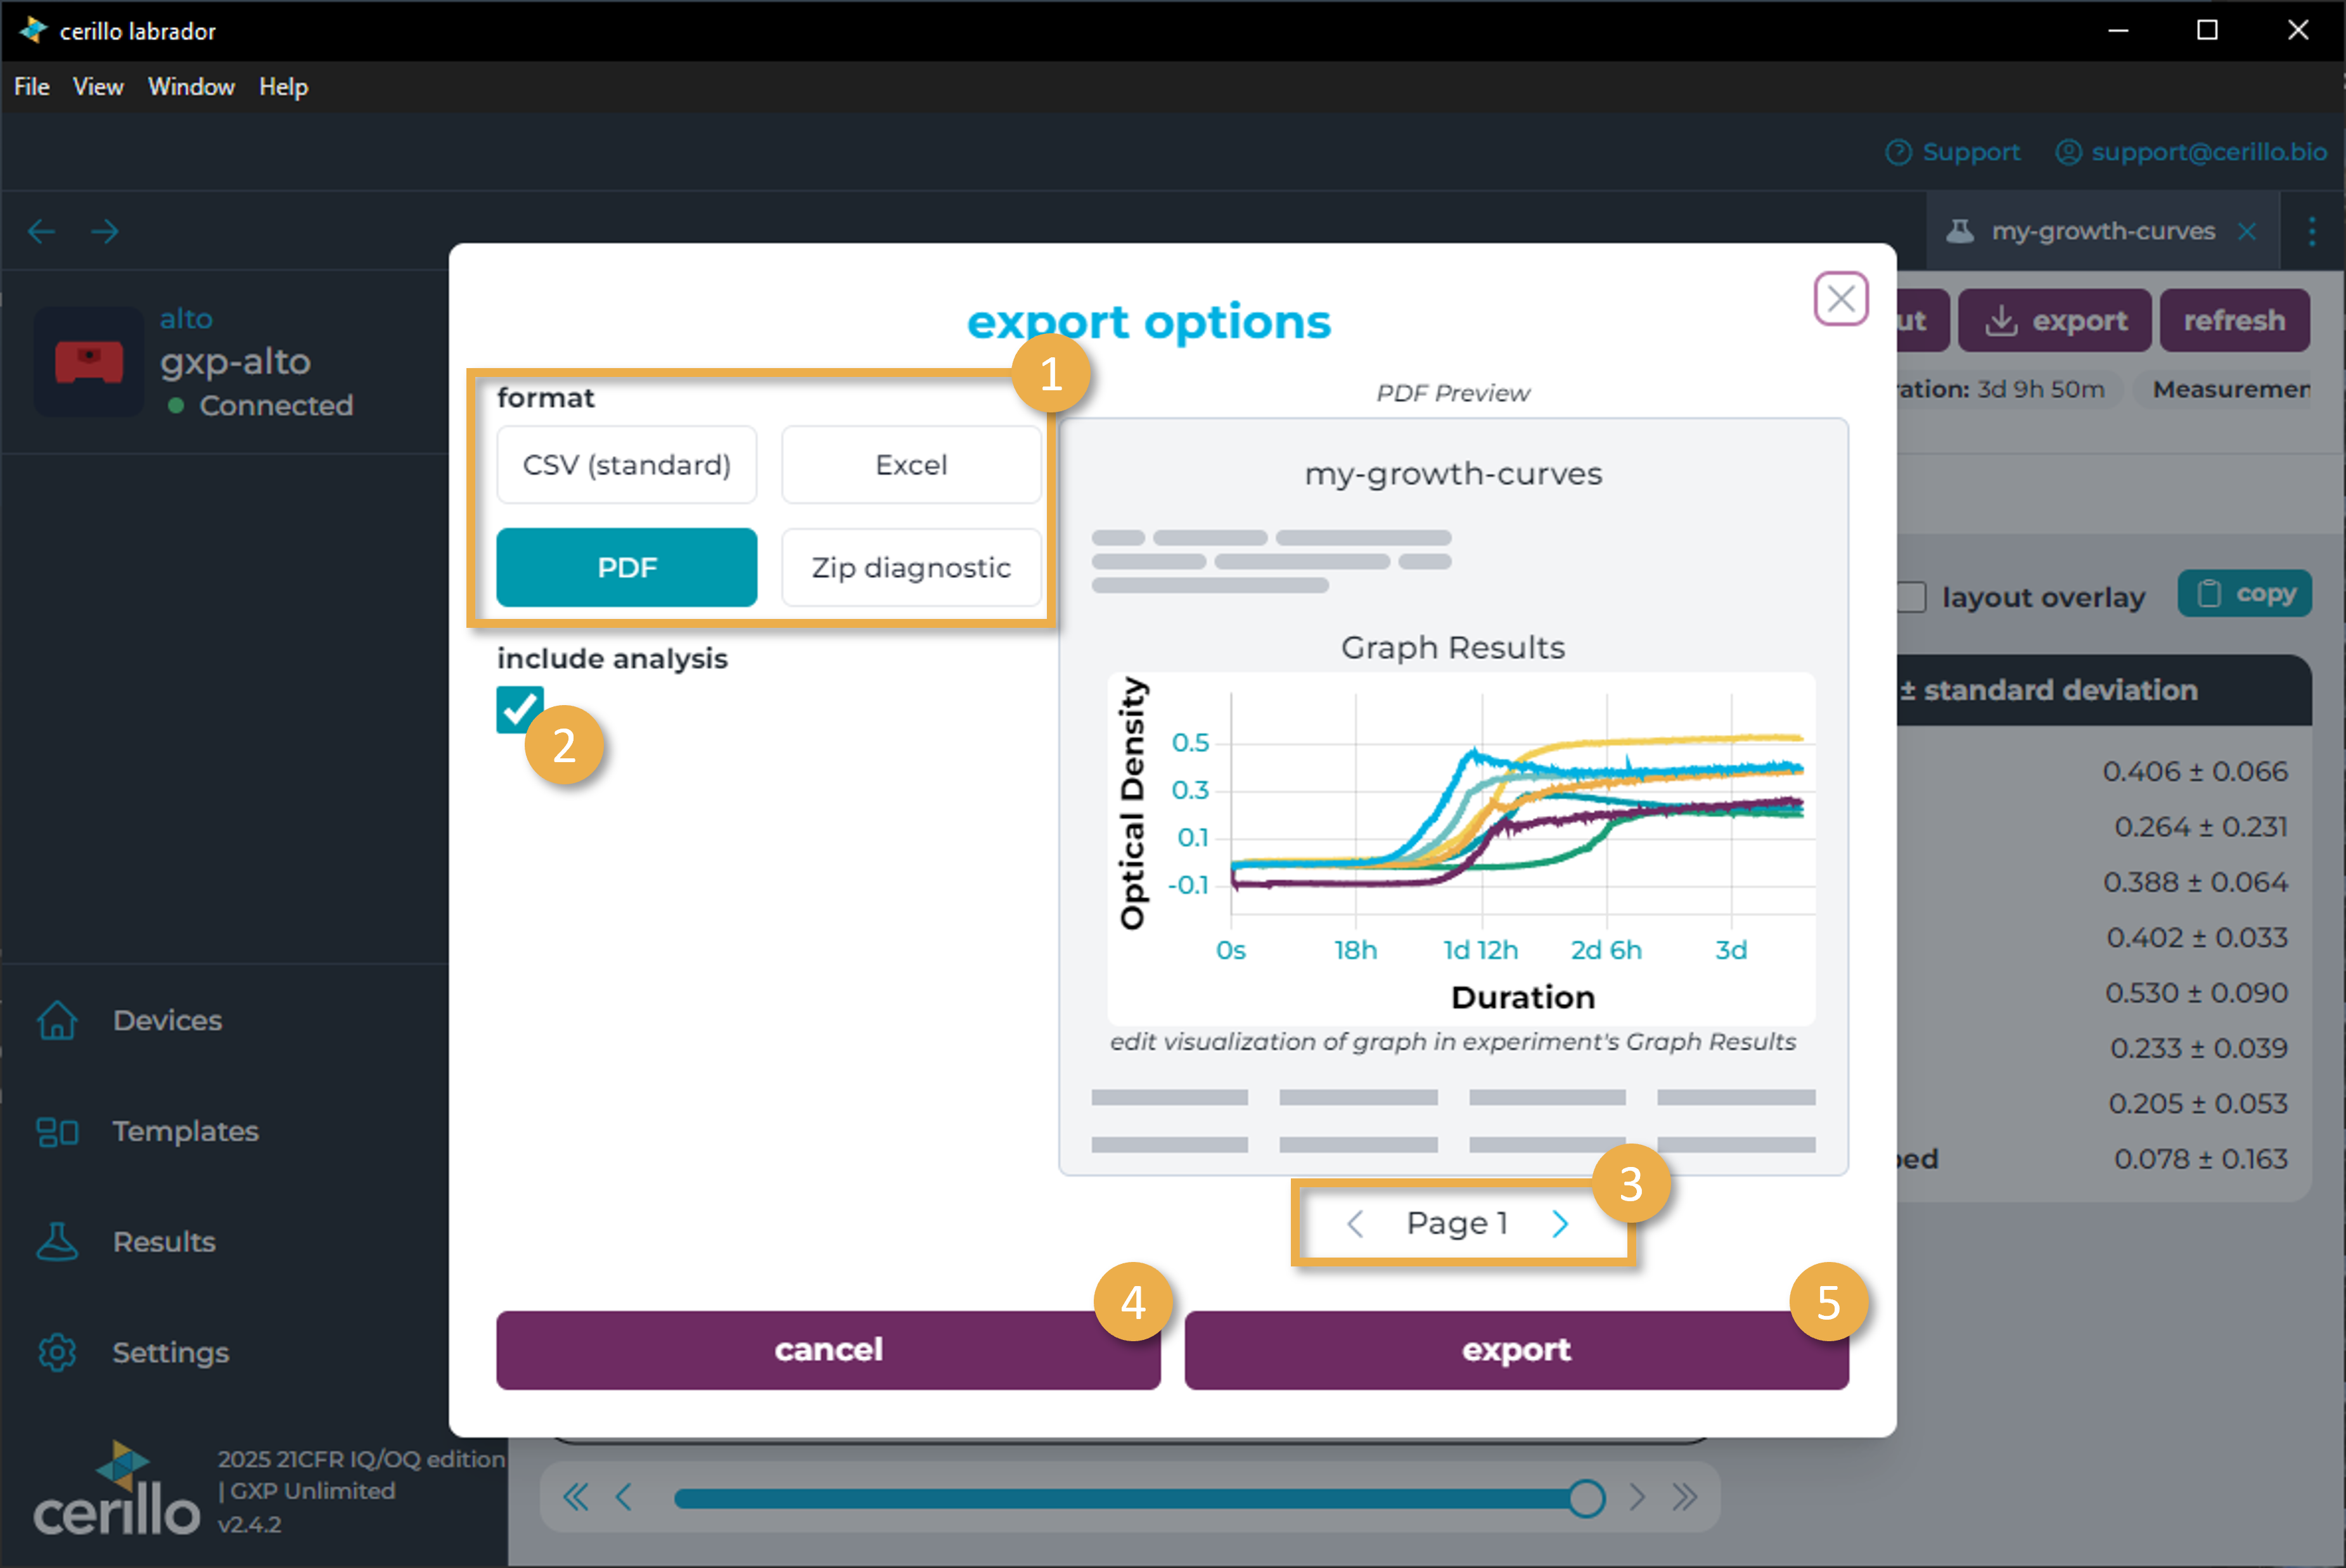
Number |
Element |
Description |
|---|---|---|
1 |
Format Select |
CSV (standard) is the most basic format and can also be saved as a |
2 |
Include Analysis toggle |
Only visible for PDF formats, this toggle will include the analysis table and associated growth graph in the |
3 |
Preview Navigation |
Click the left and right arrows to navigate through the preview of the export. |
4 |
Cancel Button |
Cancel the export and close the dialog. |
5 |
Export Button |
Export the experiment with the configured settings. Clicking this button will open a native save file window. |