Canopy Overview
The cerillo canopy is a local wireless device capable of commanding and controlling Cerillo devices. It creates a local wireless network that other cerillo devices can connect to. Devices connected to a canopy are also known as child devices of that canopy.
LED Indicators
Left LED: Status indicator
indicates the status of the canopy
Right LED: Comm indicator
indicates messages are being transmitted or received
LED |
Color |
Status |
|---|---|---|
Status |
White |
Booting |
Status |
Green |
Active/Connected and local network created |
Status |
Purple Pulse |
Scanning for cerillo Devices |
Status |
Red |
canopy software crashed and device must be rebooted |
Comms |
Blue |
XBee message transmitted or received (Rx/Tx) |
Comms |
Purple |
Serial Message Transmitted or received (Rx/Tx) |
Comms |
Red |
Error transmitting or receiving a message |
Initial Setup
Confirm receipt of all components and device.
Using your software license card, register the user account for your organization’s Labrador subscription (the device software).
Cerillo devices must be running the most up-to-date firmware to access wireless capabilities. To verify your device has the correct firmware, follow these steps:
Plug your device into a computer using the provided USB cable.
Using your computer, open the cerillo Labrador software.
Labrador will walk you through your device firmware update to ensure canopy compatibility.
For additional instructions, scan the QR code to the right.
Using the provided USB cable, connect the canopy to a computer running cerillo Labrador for power and functionality.
Reboot your device to begin using wireless capabilities.
Note
Since cerillo devices can be communicated with through USB or through a canopy, USB communication is prioritized over canopy communication. That means if a device is connected via USB as well as connected to a canopy, device communication between Labrador and the device will take place over USB and not over the canopy’s network.
Number |
Element |
Description p |
|---|---|---|
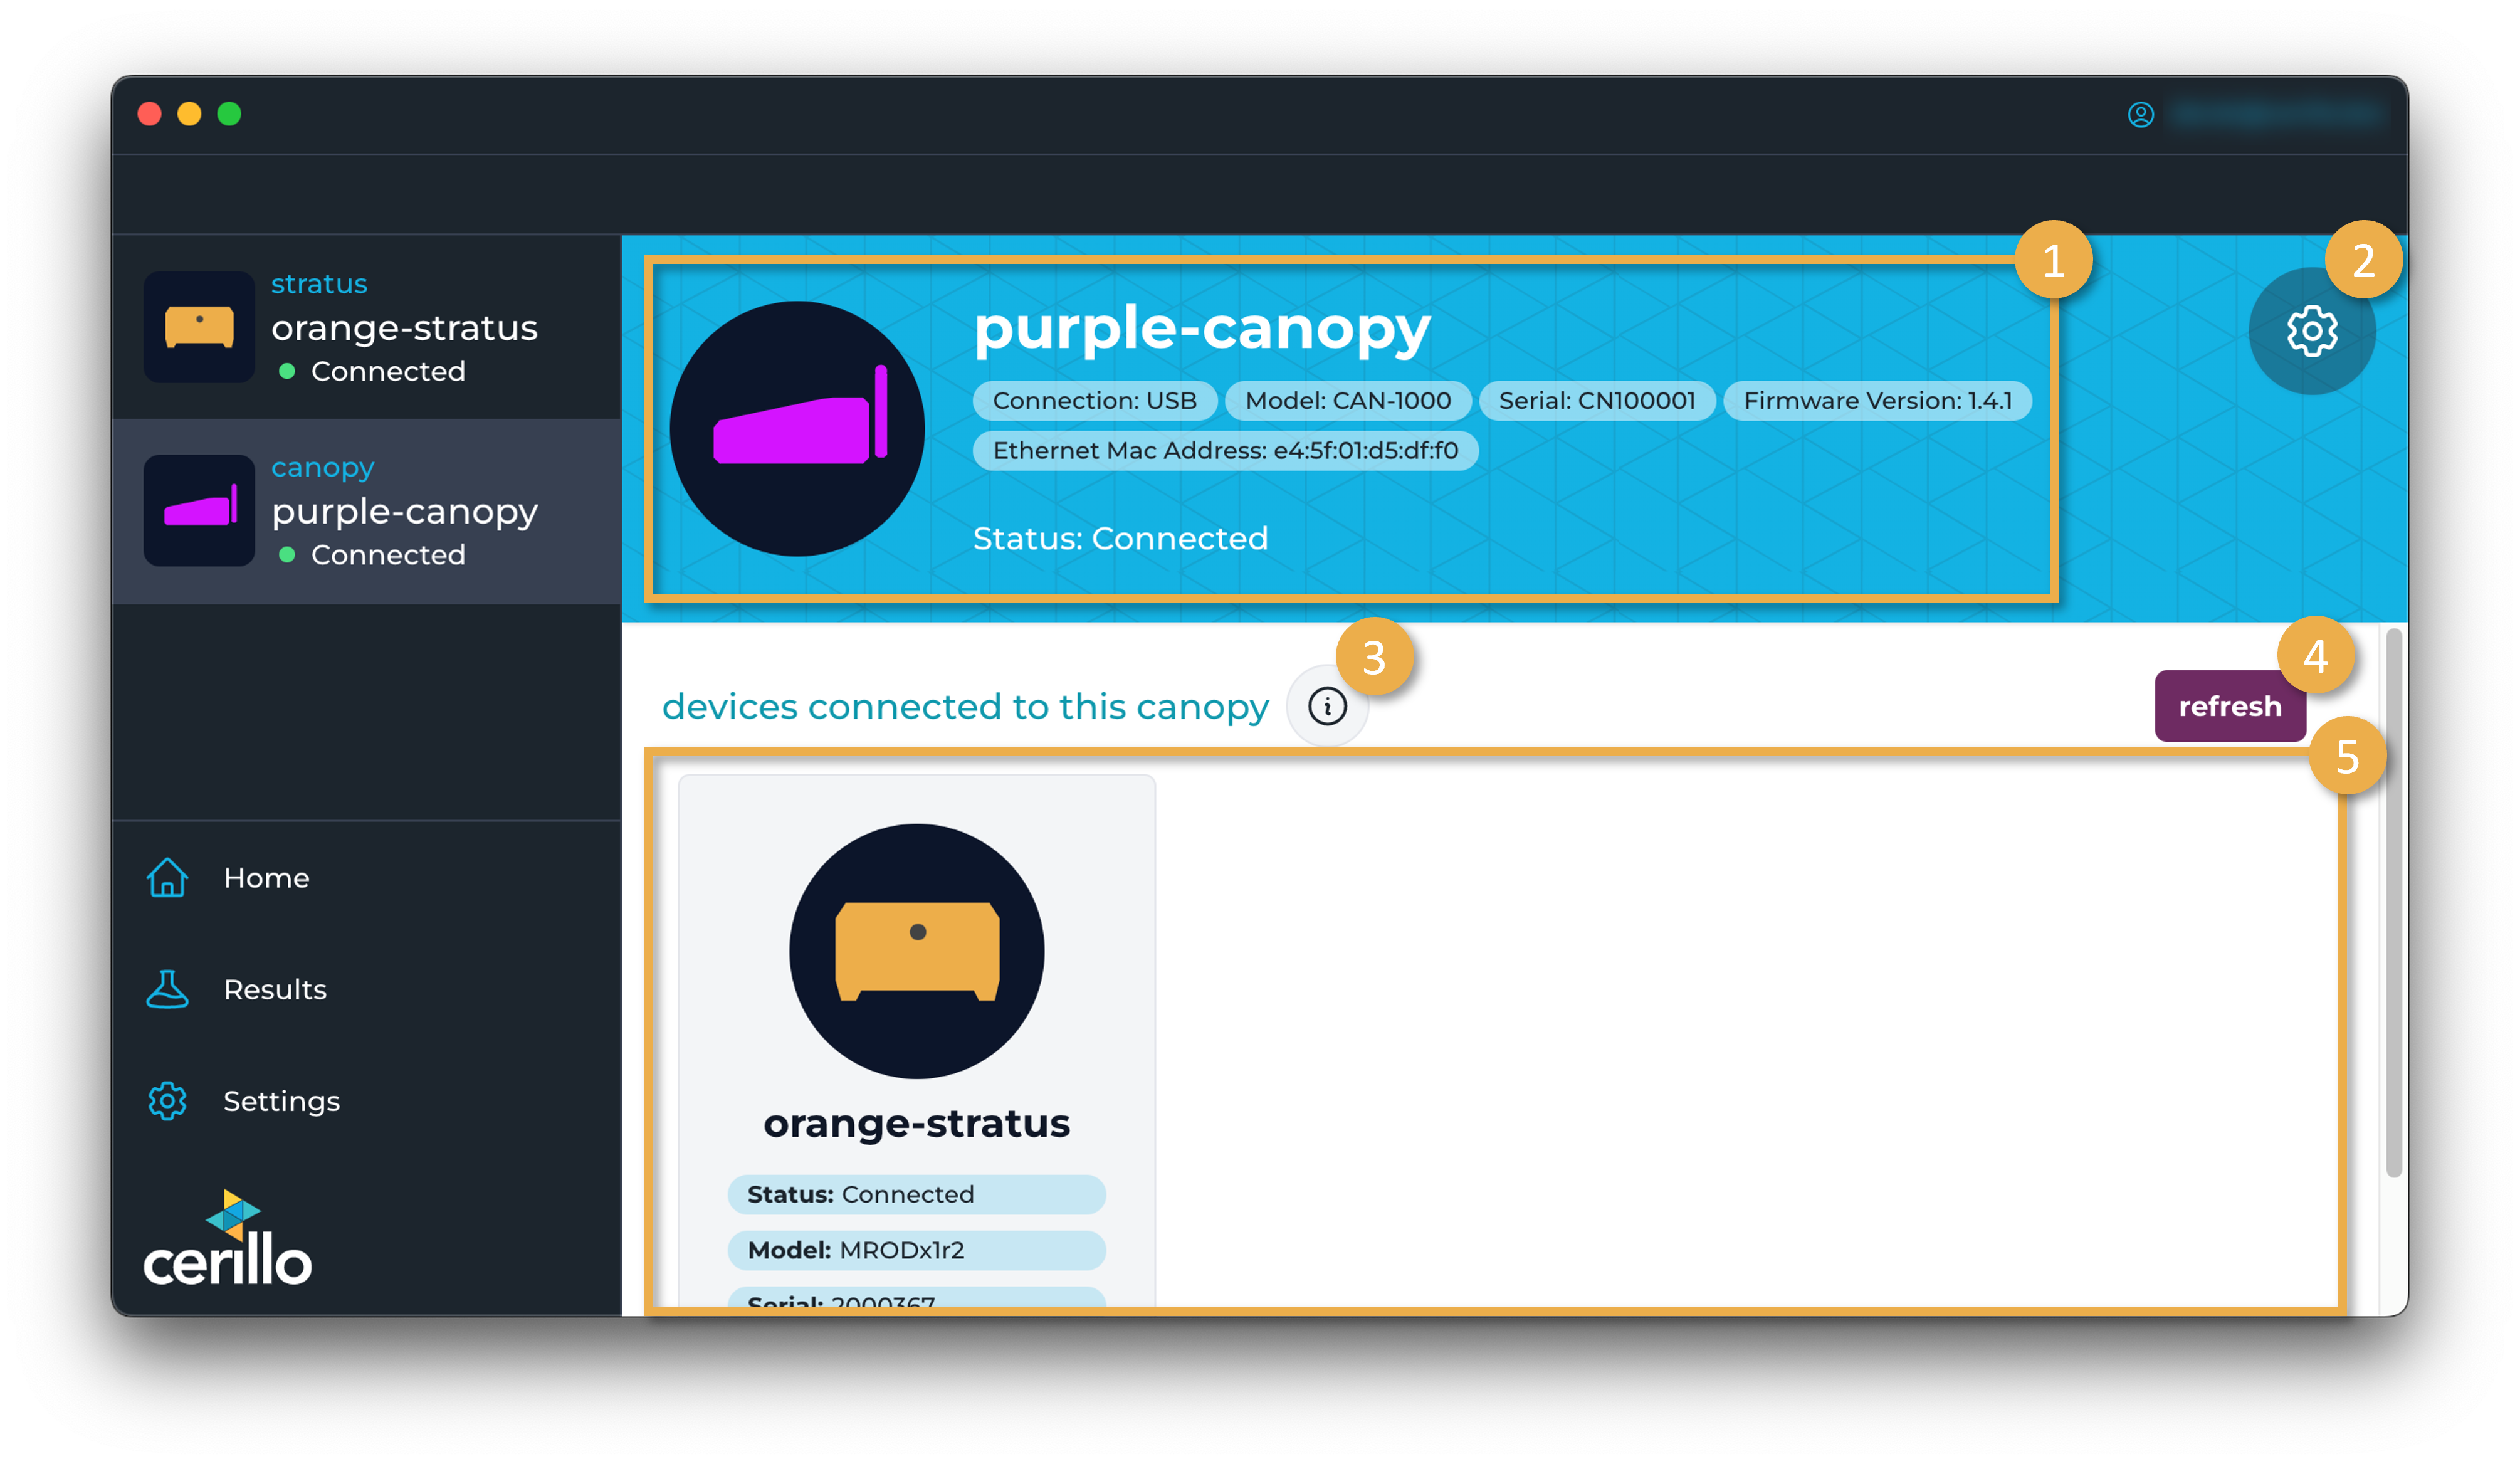
1 |
Device Info Panel |
Contains device identifying information and status information. |
2 |
Device Settings Button |
Brings up device settings in the Device Control Panel area of the application |
3 |
Canopy Network Information |
Click to view information for connecting devices to a Canopy. |
4 |
Refresh Child Devices |
Click to scan for devices connected to this canopy - typically referred to as “child” devices |
5 |
Child Device List |
Will display all devices connected to this canopy’s network - also known as “Child Devices”. Click on a device to navigate to its home page. |