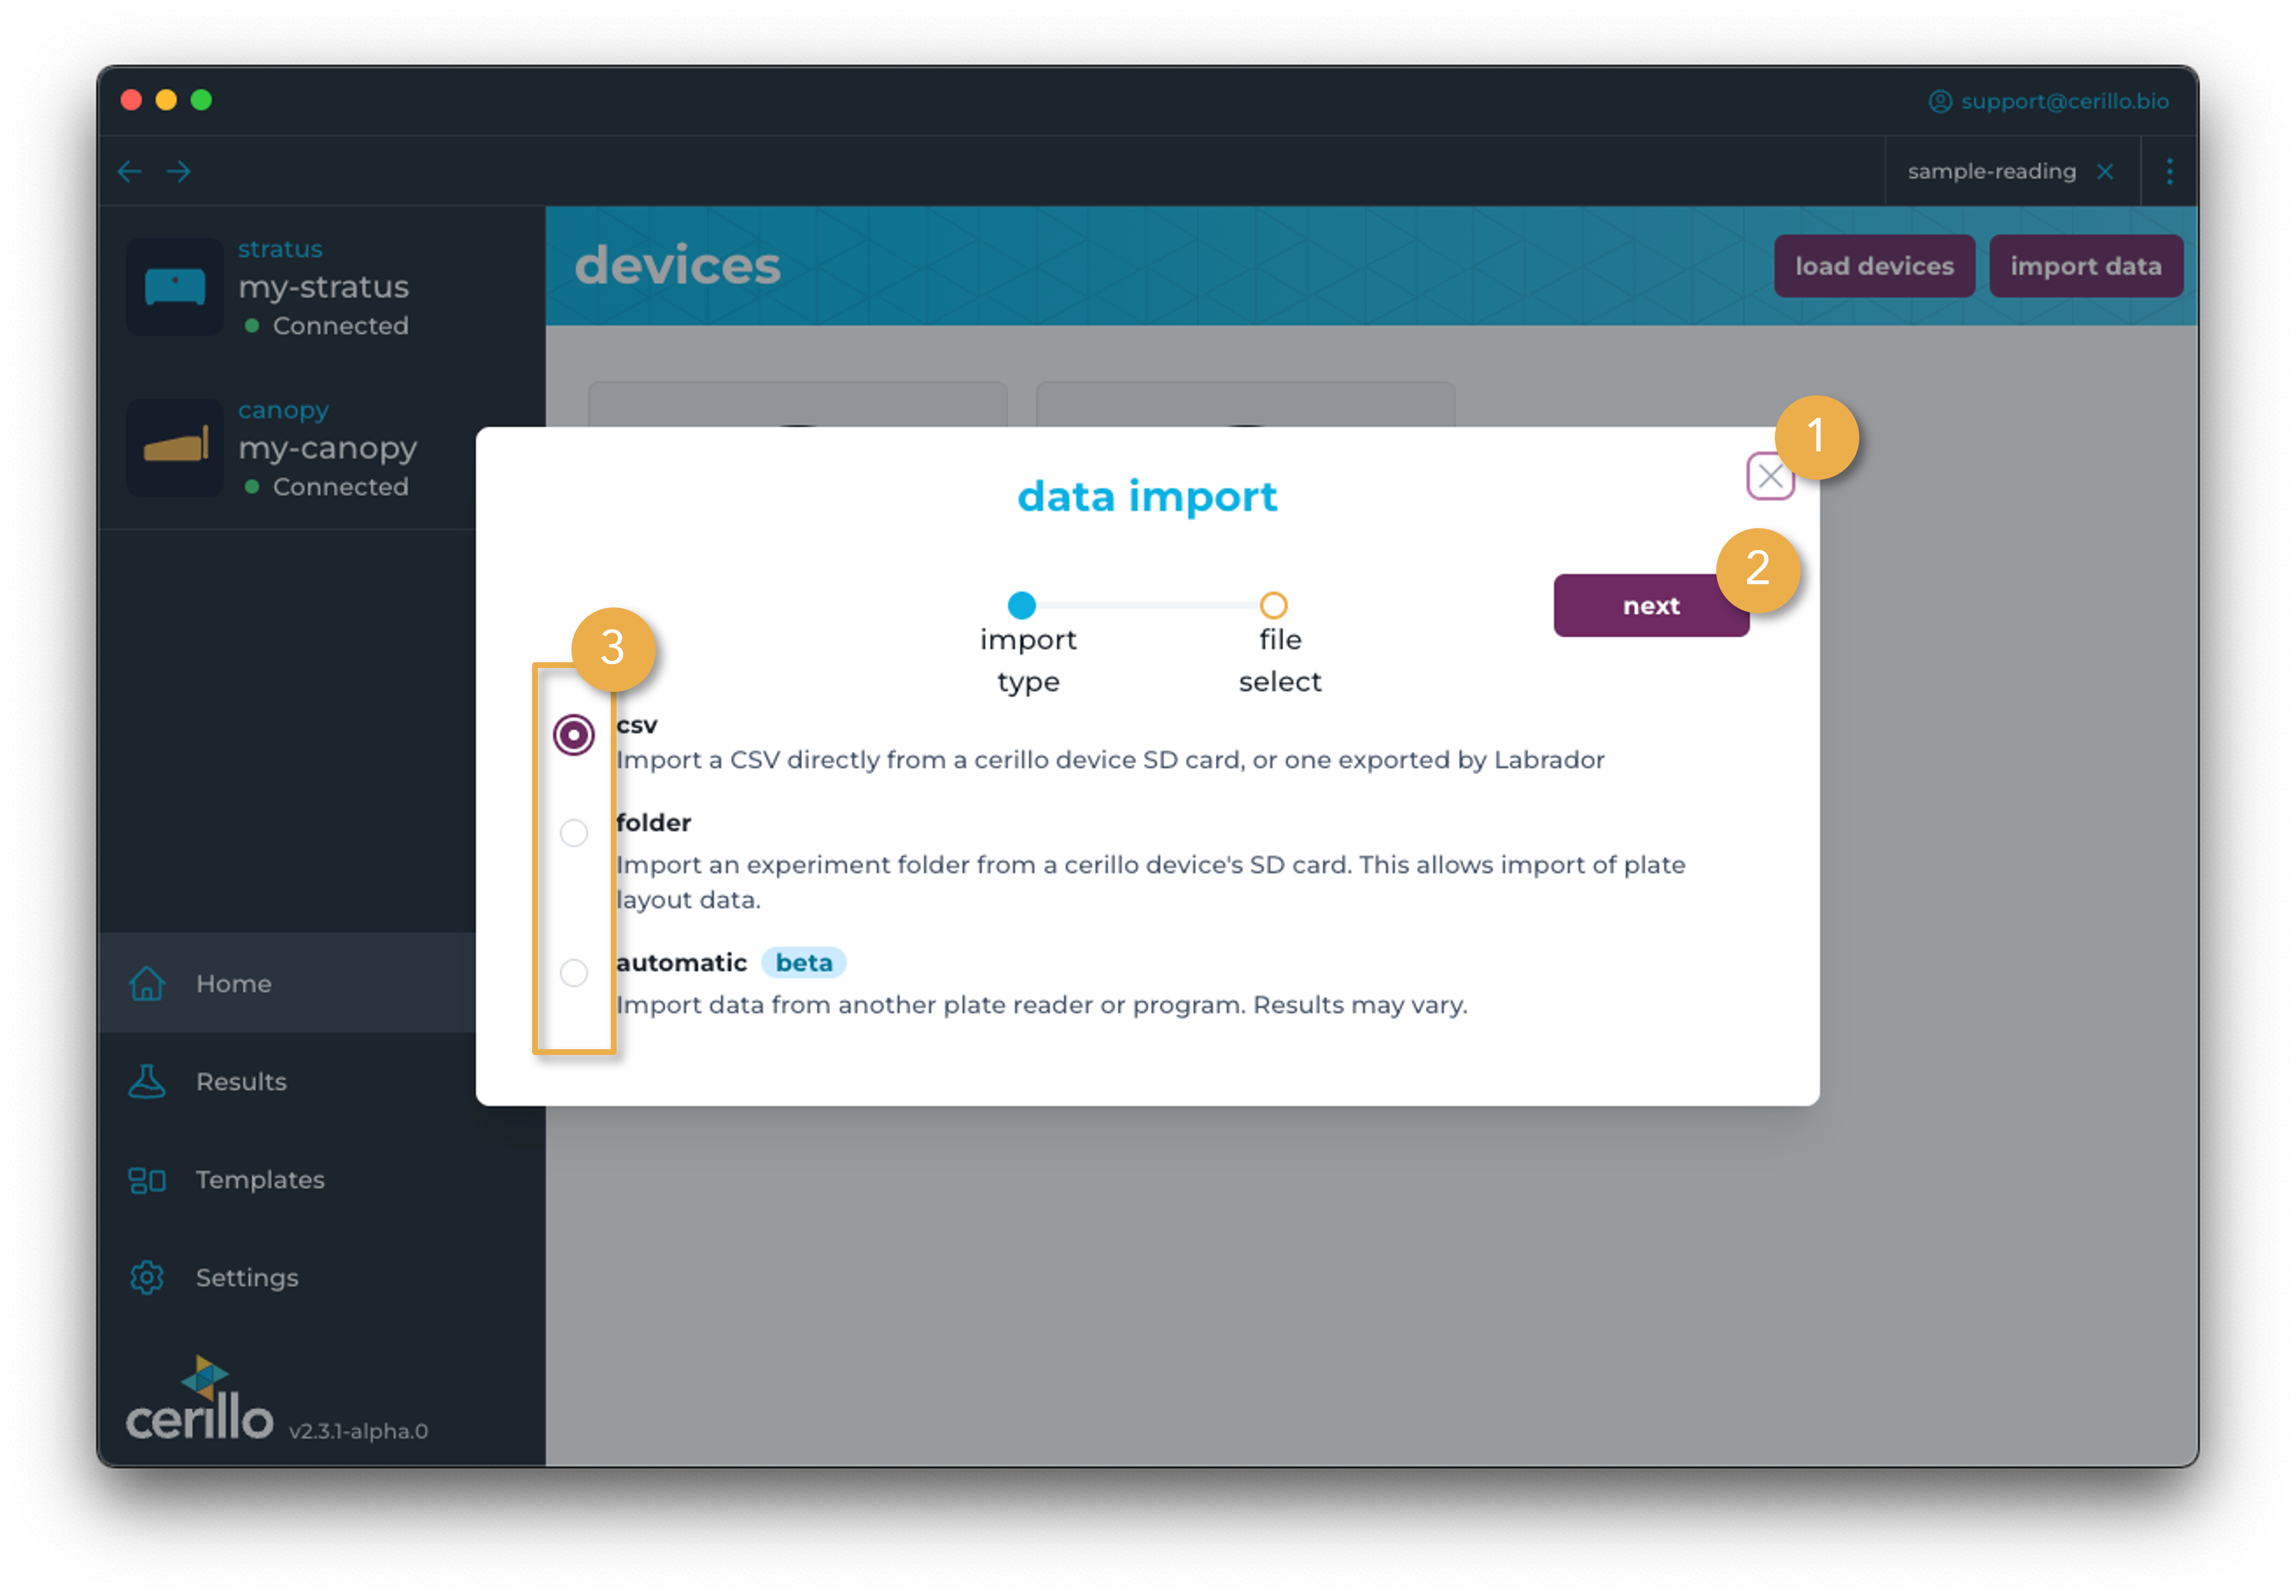
Import Data
The Data Import Wizard is used to import plate reader data from different sources into Labrador. Those sources are .csv files from cerillo devices and Labrador, folders from cerillo devices’ SD cards, and automatic which is used for importing data from other plate readers or from marked up spreadsheets.
The Data Import Wizard can be opened in three ways:
Import Data button on Home page
Import Data button in Results Page
File menu -> Import Data
Number |
Element |
Description |
|---|---|---|
1 |
Close |
Close out of the data import wizard, cancelling any imports started. Outside clicks will also close the wizard. |
2 |
Next |
Moves on to the next step in the wizard. Steps depend on the Import Type |
3 |
Import Type |
CSV - choose this import type if you are importing a |
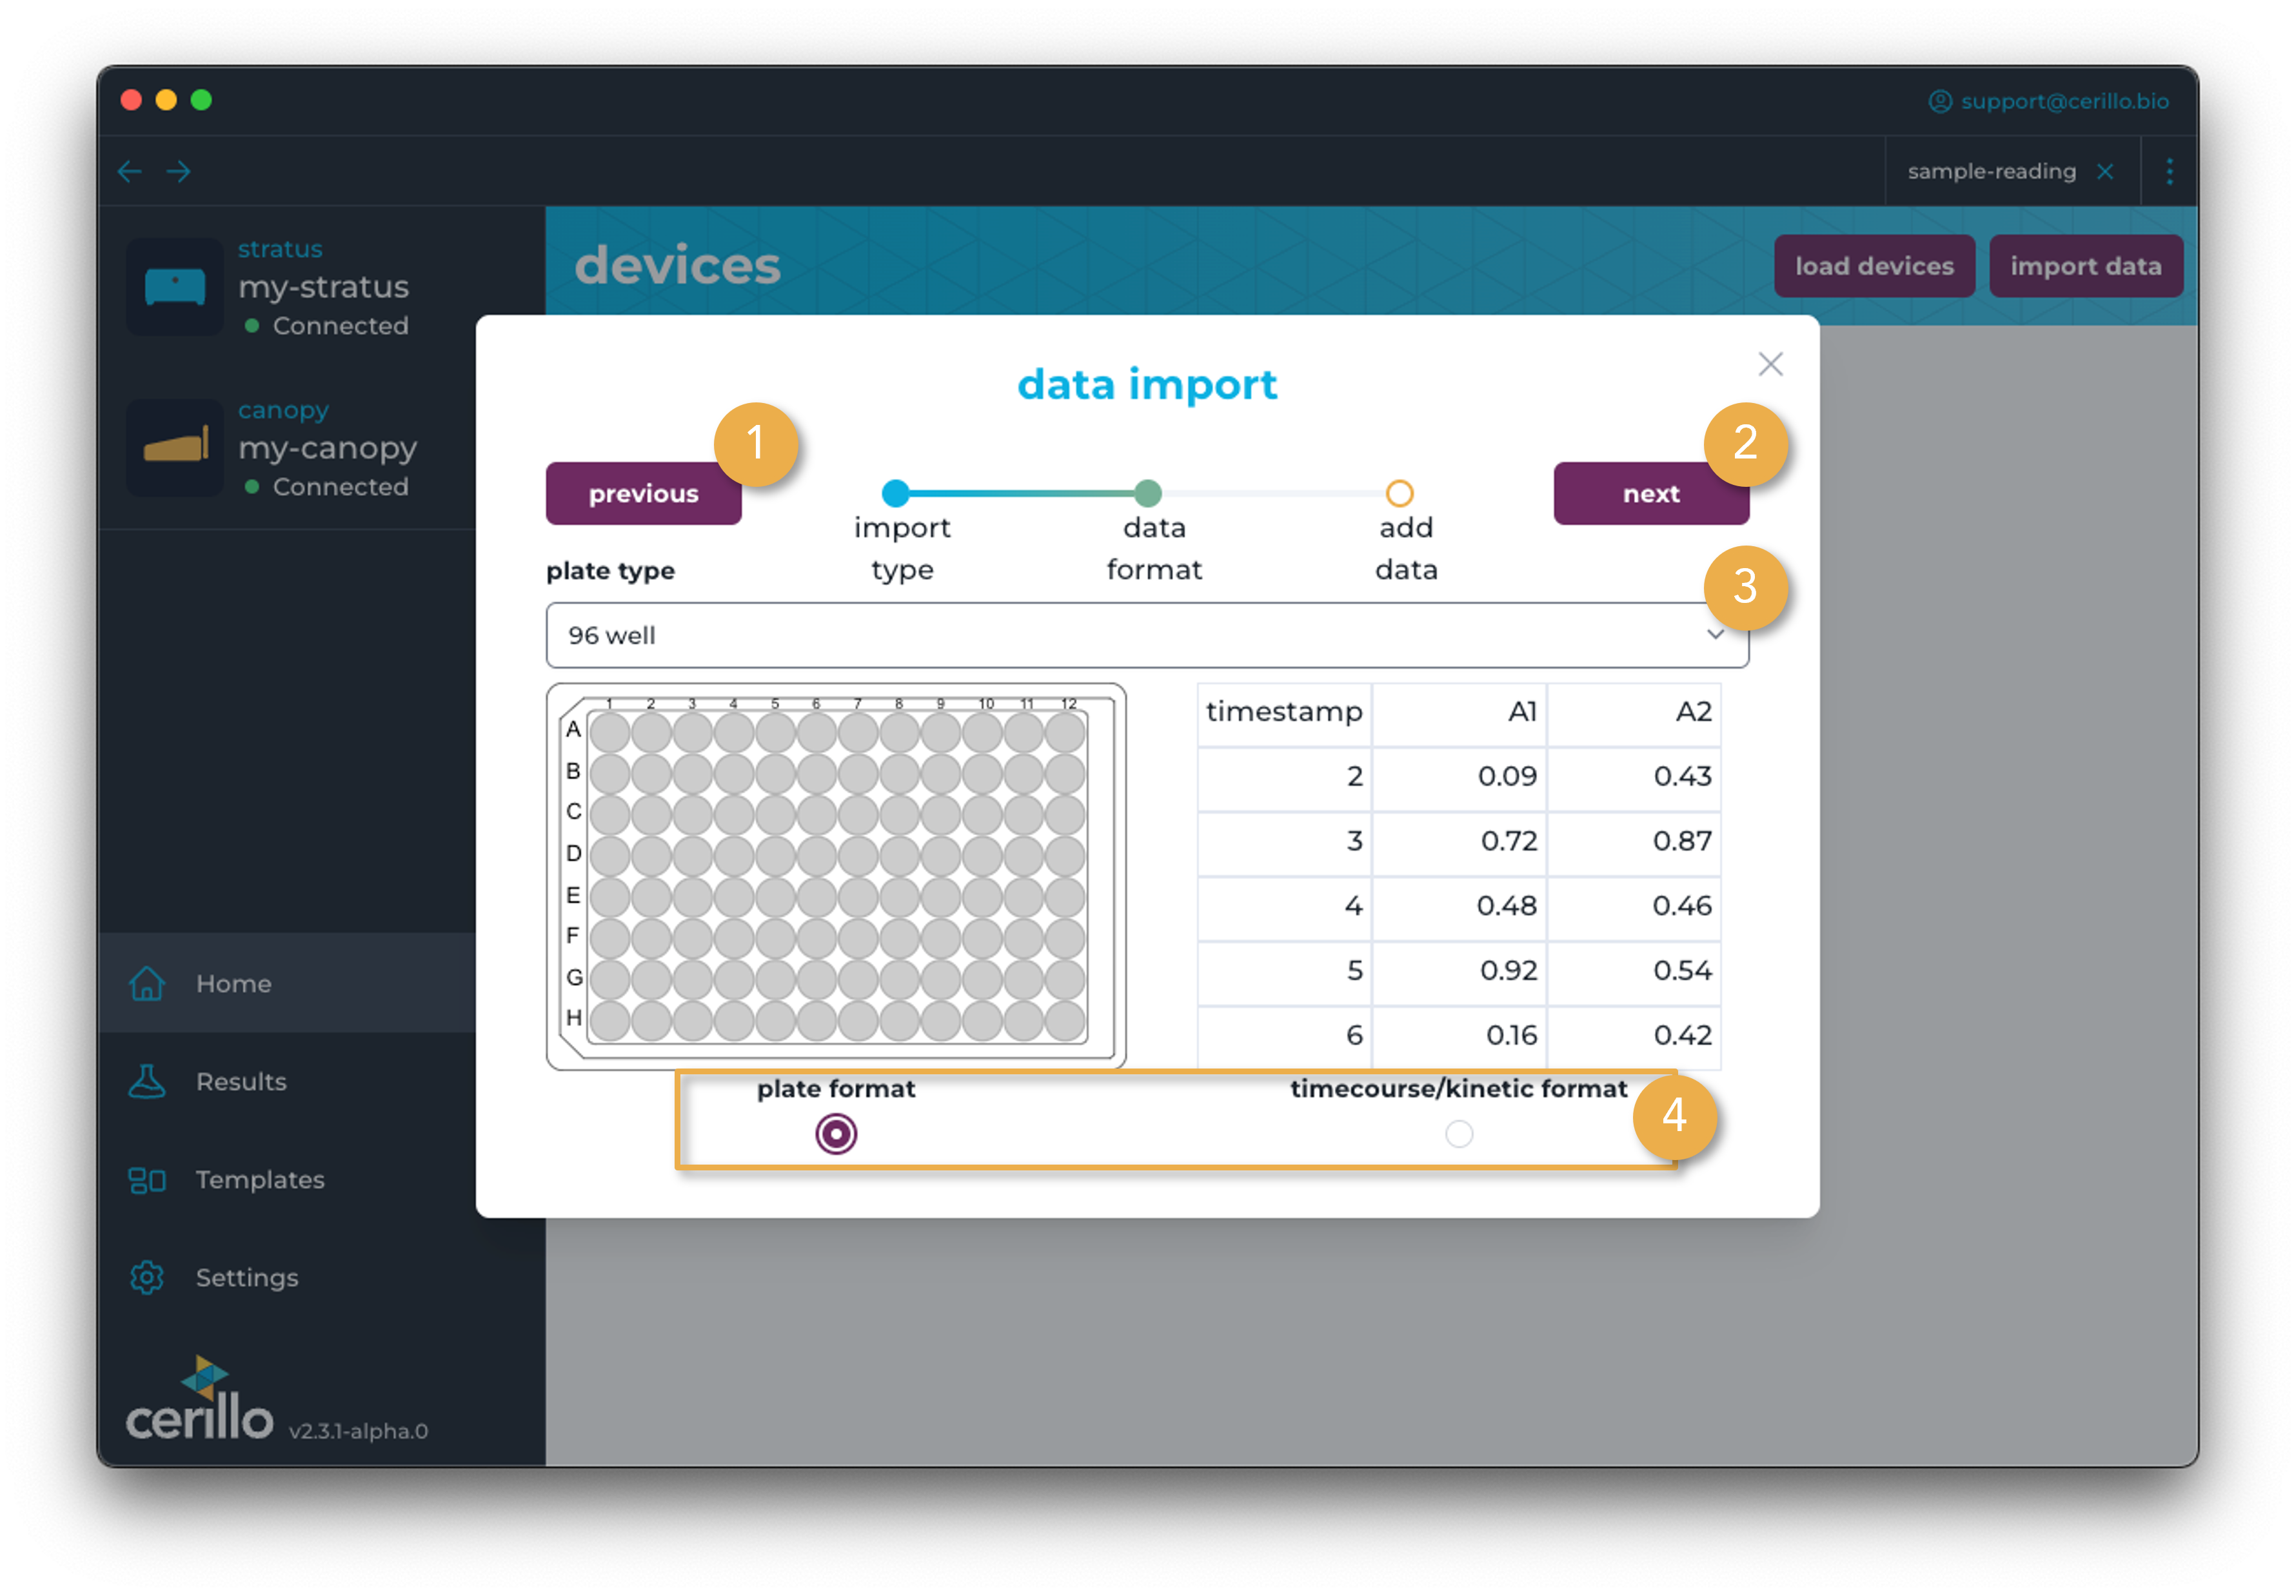
Number |
Element |
Description |
|---|---|---|
1 |
Previous |
Go back to Import Type step. |
2 |
Next |
Moves on to the Add Data step in the wizard. |
3 |
Plate Type |
Choose the plate type you are trying to import. Without selecting the proper plate type, import will most likely fail. |
4 |
Data Format Select |
If your data is organized like a plate or table where rows and columns of the data represent the rows and columns of the plate, choose Plate Format. If your data is organized by rows or columns denoting a time and with readings across the row/column, choose Timecourse/Kinetic Format. Labrador will automatically detect whether the timecourse data uses rows or columns as the time axis. Different plate readers will output data differently, so make sure to choose the correct format that your data uses! |
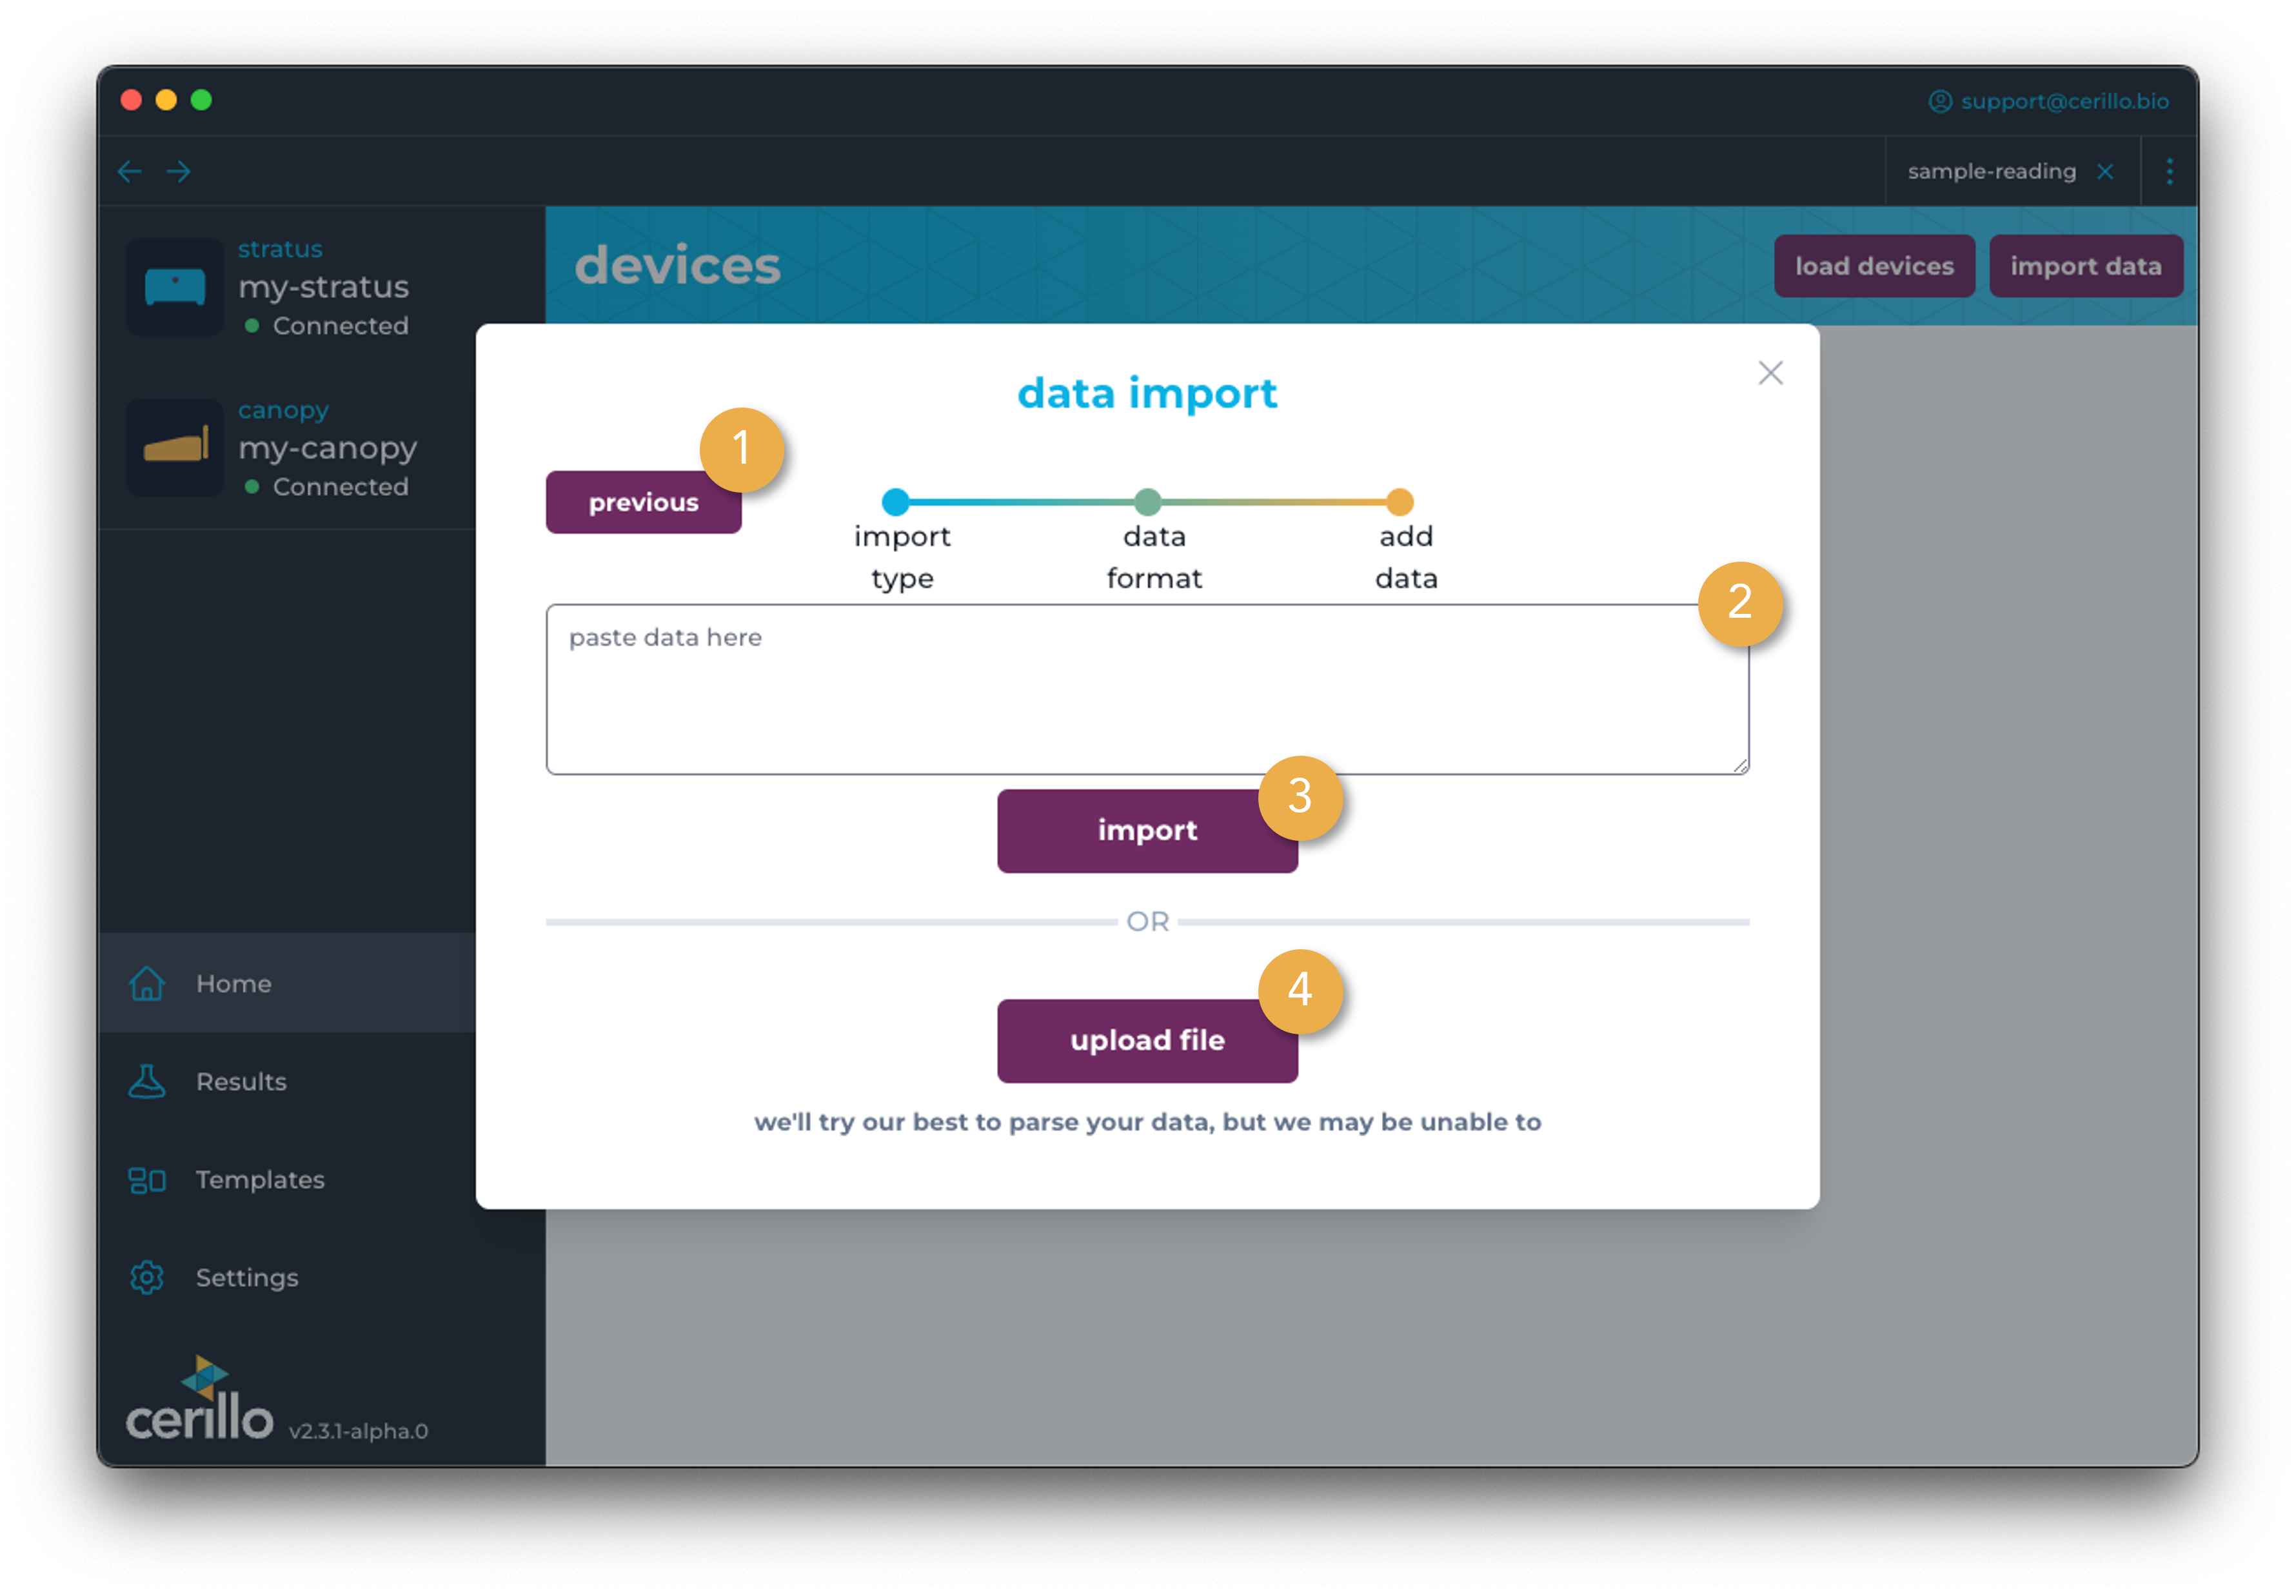
Number |
Element |
Description |
|---|---|---|
1 |
Previous |
Go back to Data Format step. |
2 |
Text Input |
Paste data into this field to import from your clipboard. |
3 |
Import |
Will attempt to import data from the text pasted into the Text Input |
4 |
Upload File |
Will open a window to choose a file to upload for import. File types generally accepted are |
Tip
If your automatic data is not importing correctly, it can help to paste only the measurements into the Text Input rather than uploading a file.
Note
If you have data files that fail to import correctly, we would love to improve our parsing algorithms to better import your data. Feel free to send files that failed to import to support@cerillo.bio with the subject “Import Data Failed”
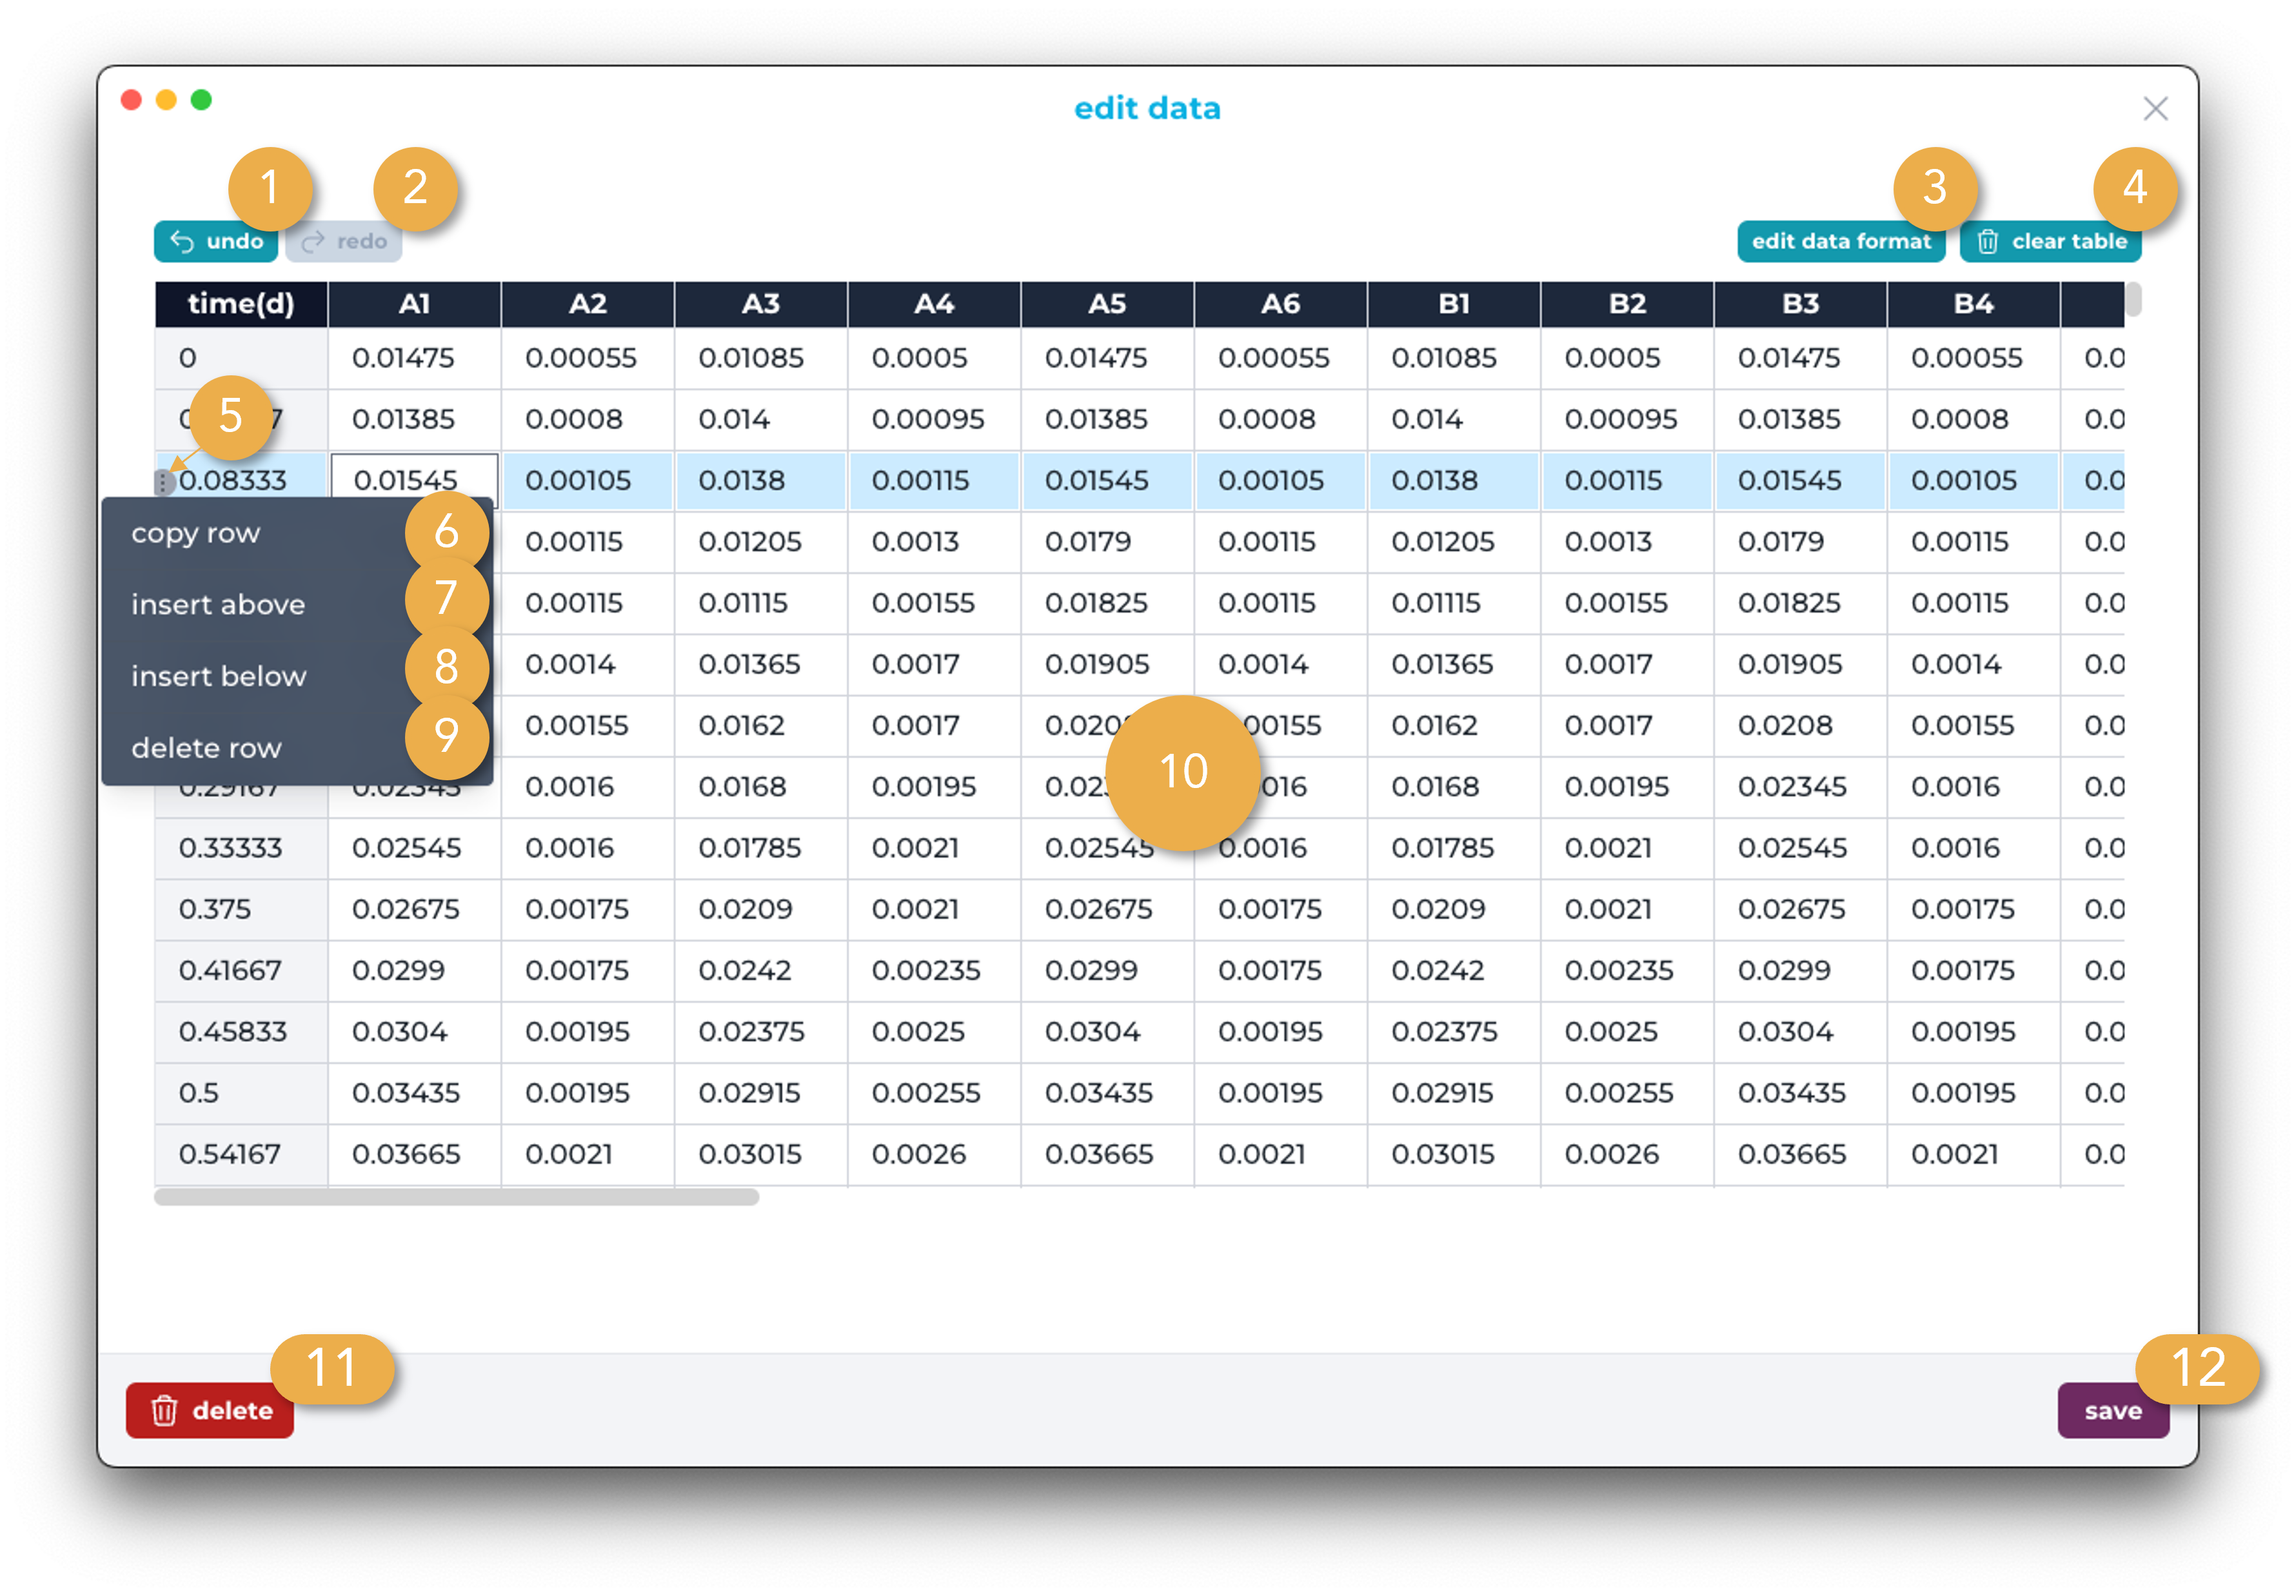
Data Editing
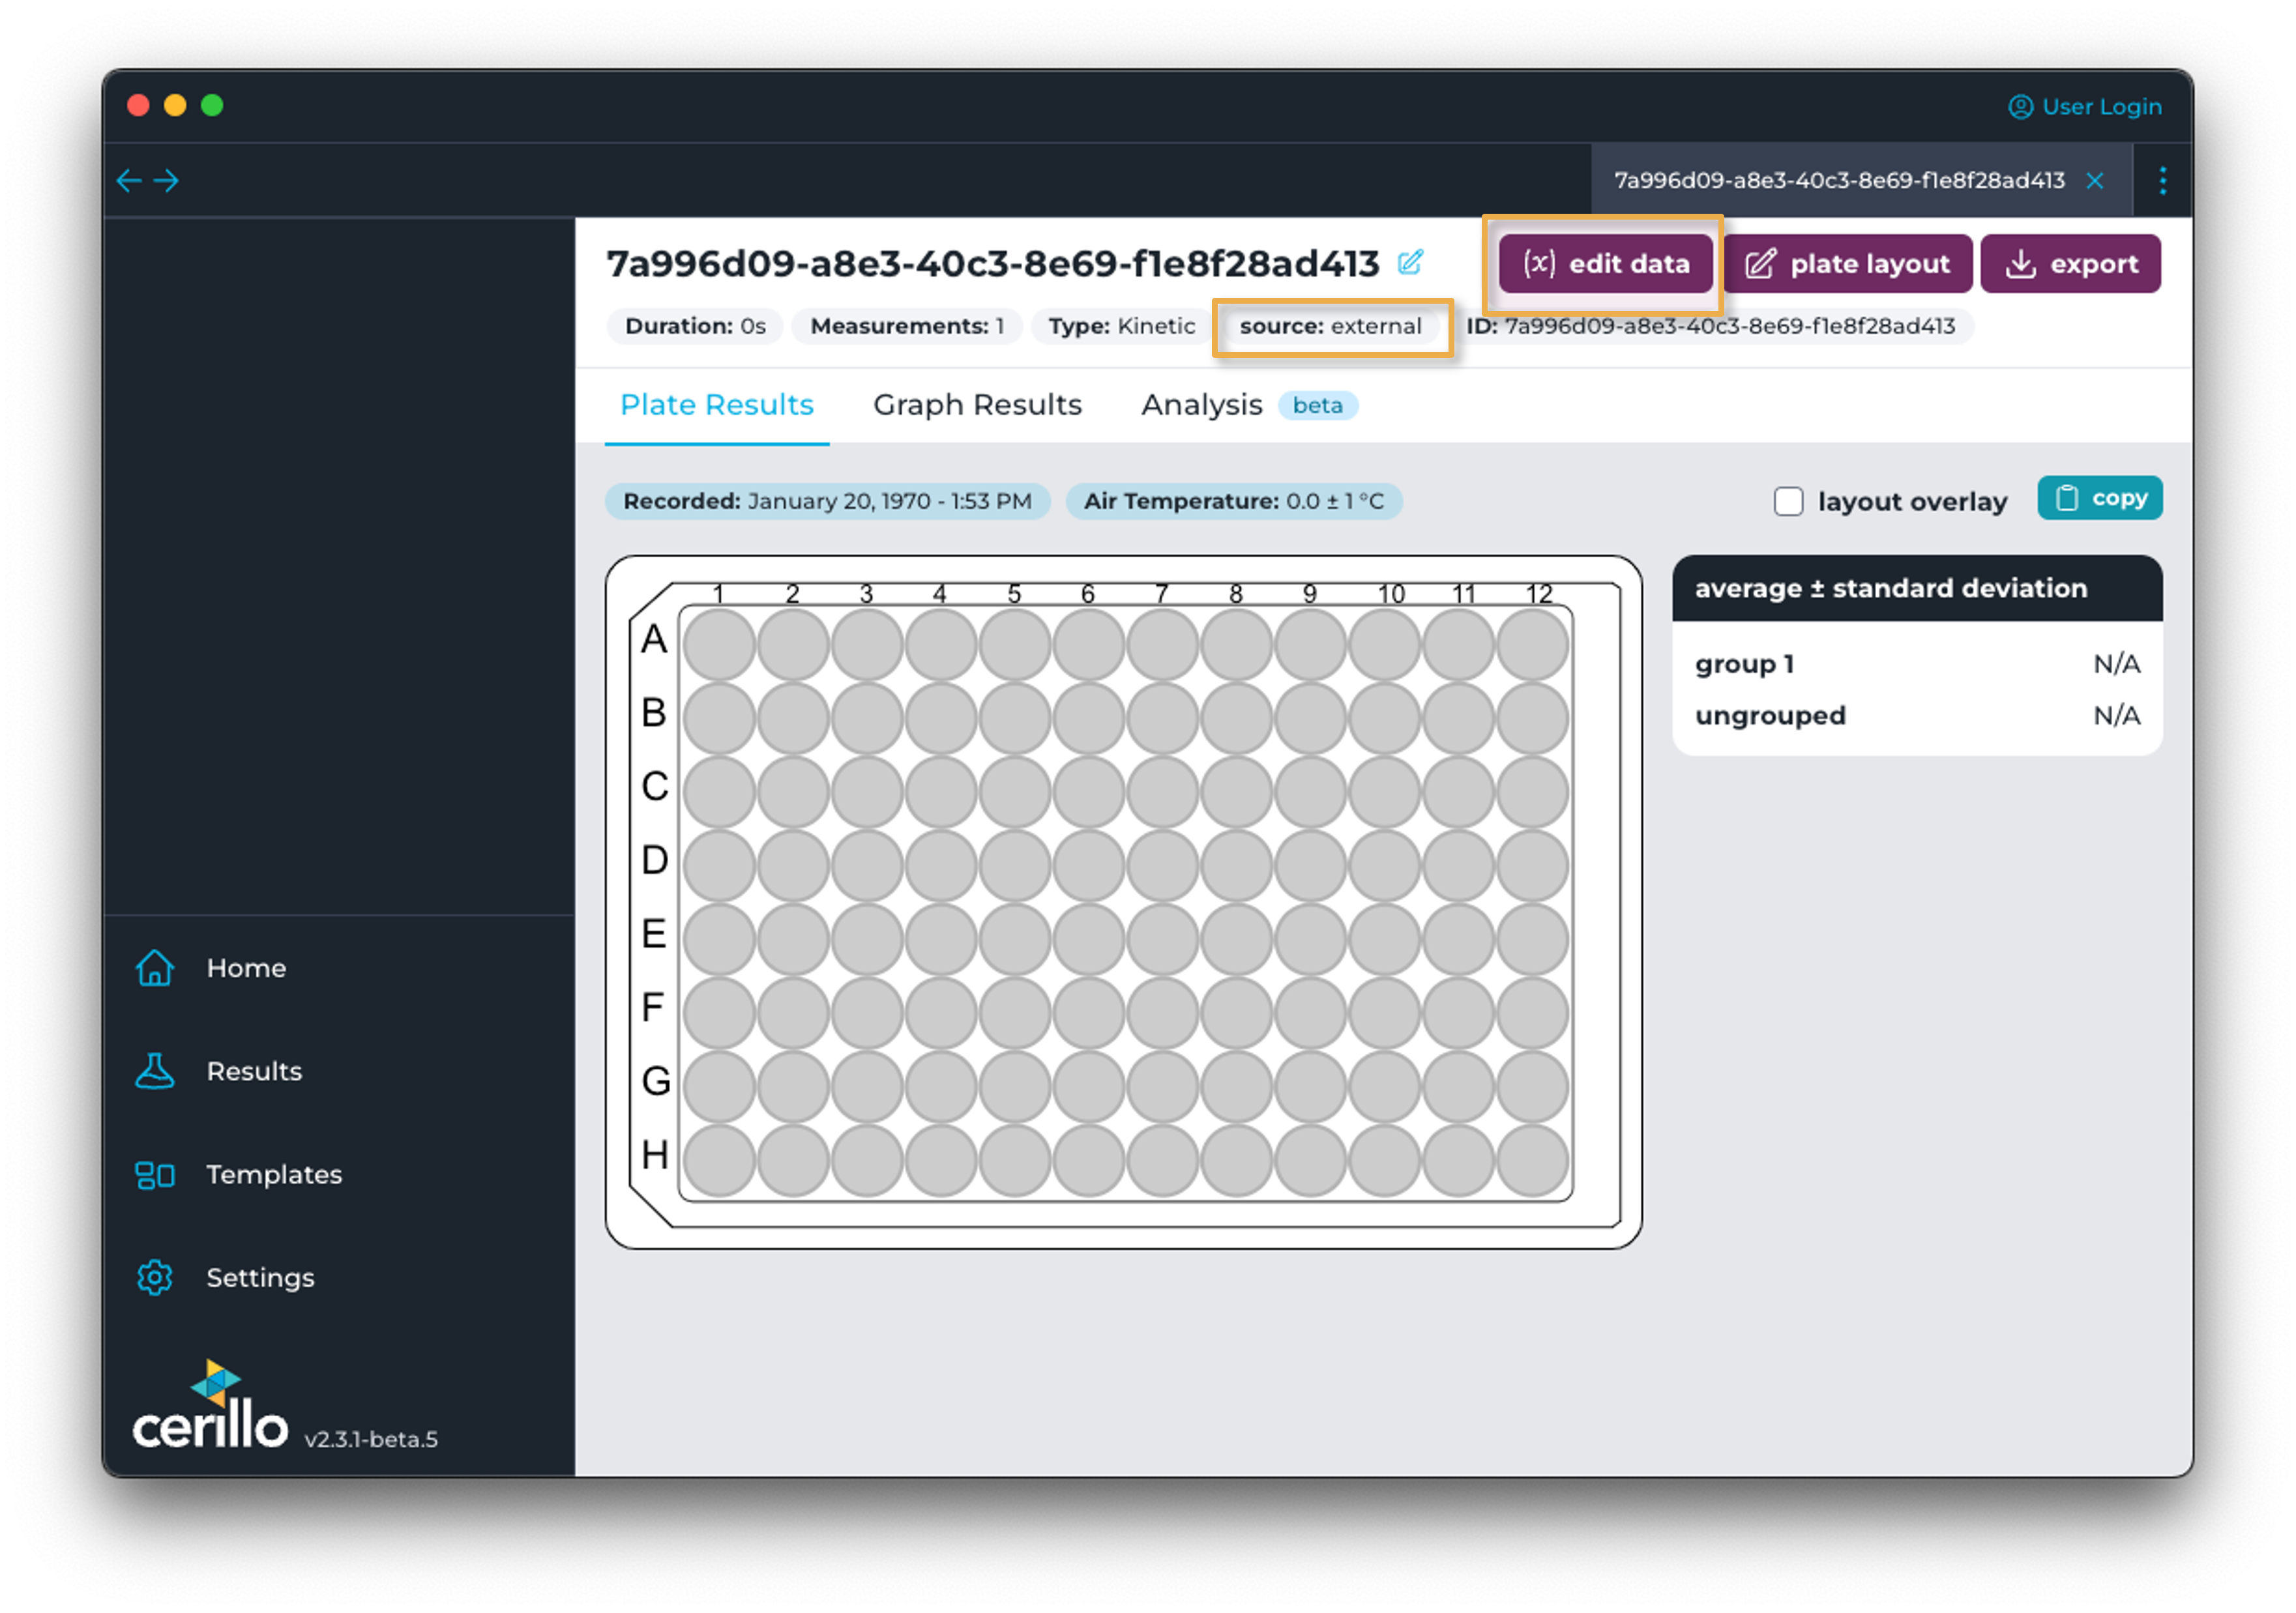 For any external or non-cerillo experiment imported into Labrador, data editing tools are available to add or update data. For any external experiment, the edit data button will be available which will open up an editable data table overlay.
Number |
Element |
Description |
|---|---|---|
1 |
Undo |
Undo the most-recent change to data |
2 |
Redo |
Redo the most-recent undone change |
3 |
Edit Data Format |
Edit the data format including the time interval unit, the plate type, and whether to input data in plate format (for an endpoint experiment) or in a kinetic format (as displayed here) |
4 |
Clear Table |
Clear all data from table. Undo is available if this is clicked by accident. |
5 |
Row Menu |
Click here to select the full row and open up the row menu |
6 |
Copy Row |
Copy the contents of this row. Can be pasted with ctrl+v or ⌘v |
7 |
Insert Above |
Insert a blank row above the currently selected row |
8 |
Insert Below |
Insert a blank row below the currently selected row |
9 |
Delete Row |
Delete this row |
10 |
Table Cells |
Click an individual cell to edit it’s contents. Click and drag to select multiple cells for deletion, copying (ctrl+c or ⌘c), or cutting (ctrl+x or ⌘x). Paste content into cells with ctrl+v or ⌘v. Content that can be pasted into the table includes data copied from the table as well as data from external programs like excel, numbers, or google sheets. |
11 |
Delete Experiment |
Offers a way to delete external experiments. Confirmation required before deletion occurs. |
12 |
Save |
Save data to experiment and close overlay. Clicking the x button will also save the data to the experiment. |
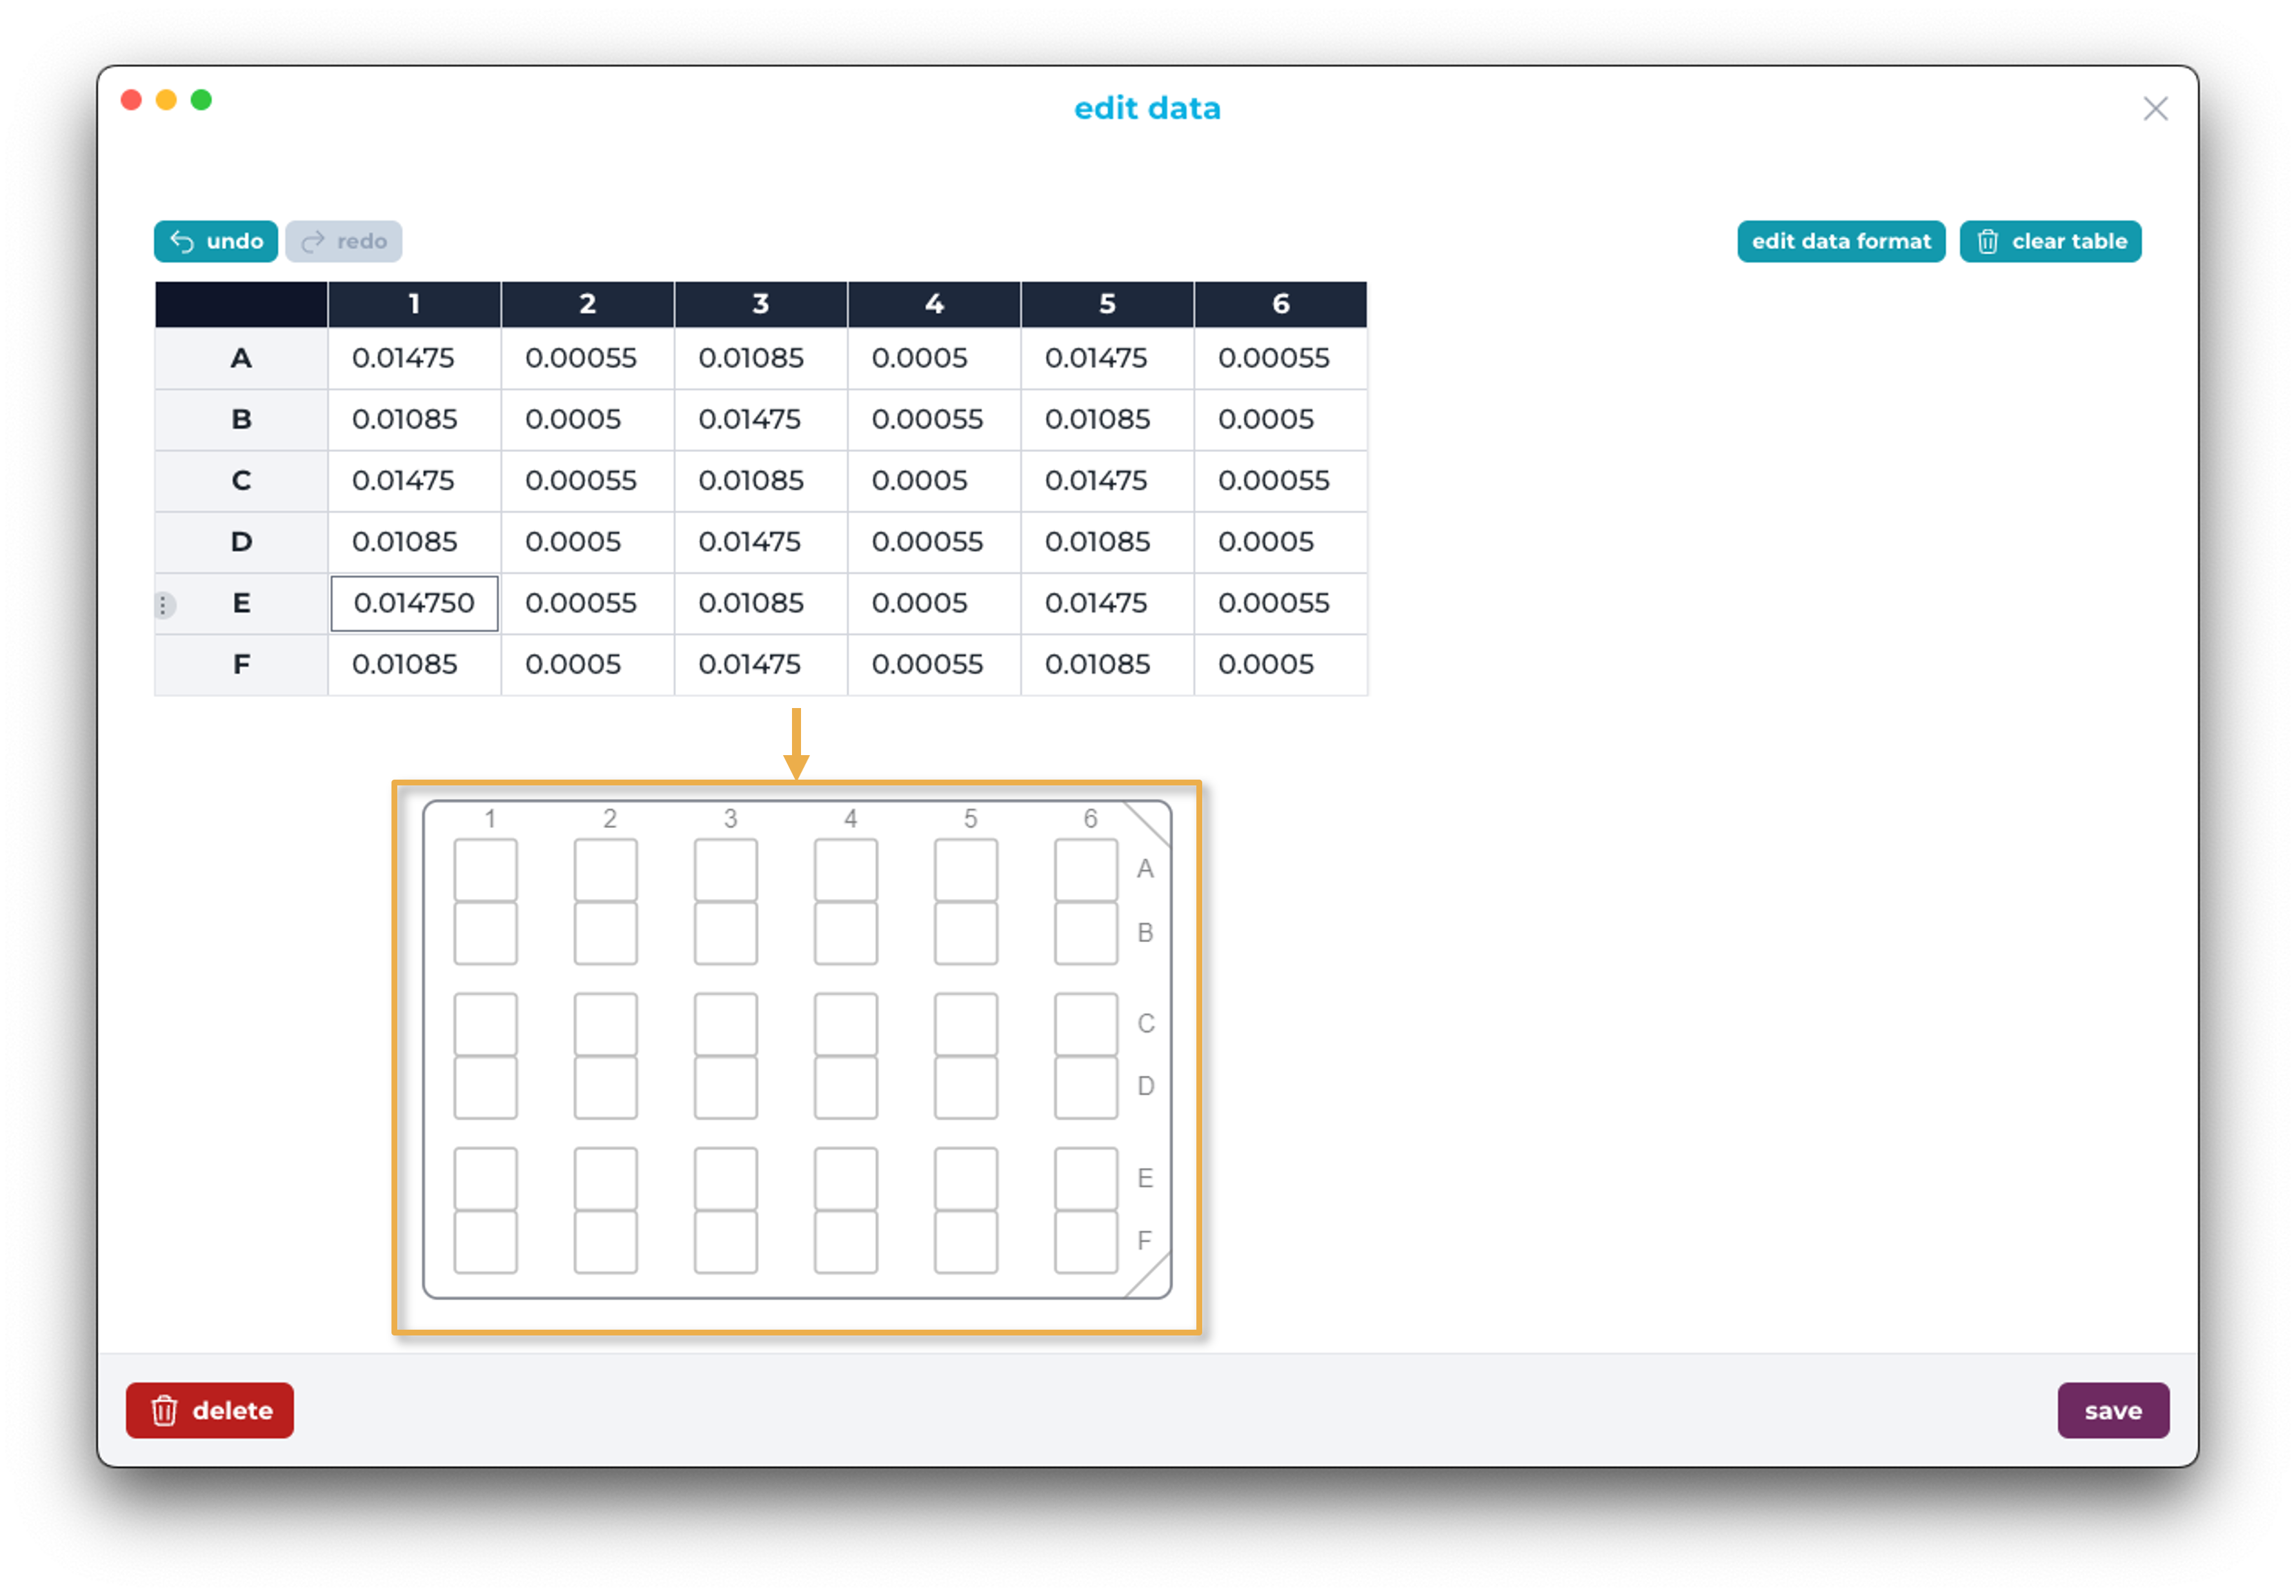
Editing endpoint experiments works the same way as described above, but the interface will show the table in plate format as seen below, where the table matches a co-culture plate.
Importing Cerillo Co-Culture Duet System into Labrador
Data imported from an external data source can also be remapped to other plate types after import. A common use case for this is importing co-culture data from another plate reader as a 96-well plate and then remapping it to a Cerillo Co-culture Plate, since we have co-culture plate definition within Labrador. This can be accomplished with the following steps:
Import the data either with the External option, or by starting with a Blank experiment and pasting the data into the edit data table. Make sure to choose 96-well as the plate type at this stage.
Go to the plate layout, and choose to remap the data to Cerillo Co-Culture Plate
Click Save
Now, you should see that your data has removed the detectors covered up by the plate frame and should only see your sample data. At this point you can export your data or add your plate layout for visualization.